Revit to AI Render: How Architects Turn BIM Models into Photoreal Visuals in Seconds
Learn how architects and BIM coordinators convert Autodesk Revit 3D views into photorealistic architectural renders in seconds using AI without installing heavy plugins or waiting for slow cloud queues.
Autodesk Revit is the undisputed backbone of modern architecture and BIM (Building Information Modeling). Over 60% of architectural practices rely on Revit to coordinate floor plans, structural grids, MEP systems, and construction documents. Yet for all of Revit's engineering precision, architectural rendering remains a persistent headache for design teams.
Revit's built-in rendering engine is notoriously slow and outdated, producing flat, artificial visuals that look straight out of 2005. Third-party desktop plugins like V-Ray, Enscape, or Lumion require high-end graphics workstations, complex material setups, and hefty recurring license fees per seat. Worse, many corporate architecture studios and government contractors operate on locked-down IT machines where installing unapproved desktop plugins is strictly forbidden.
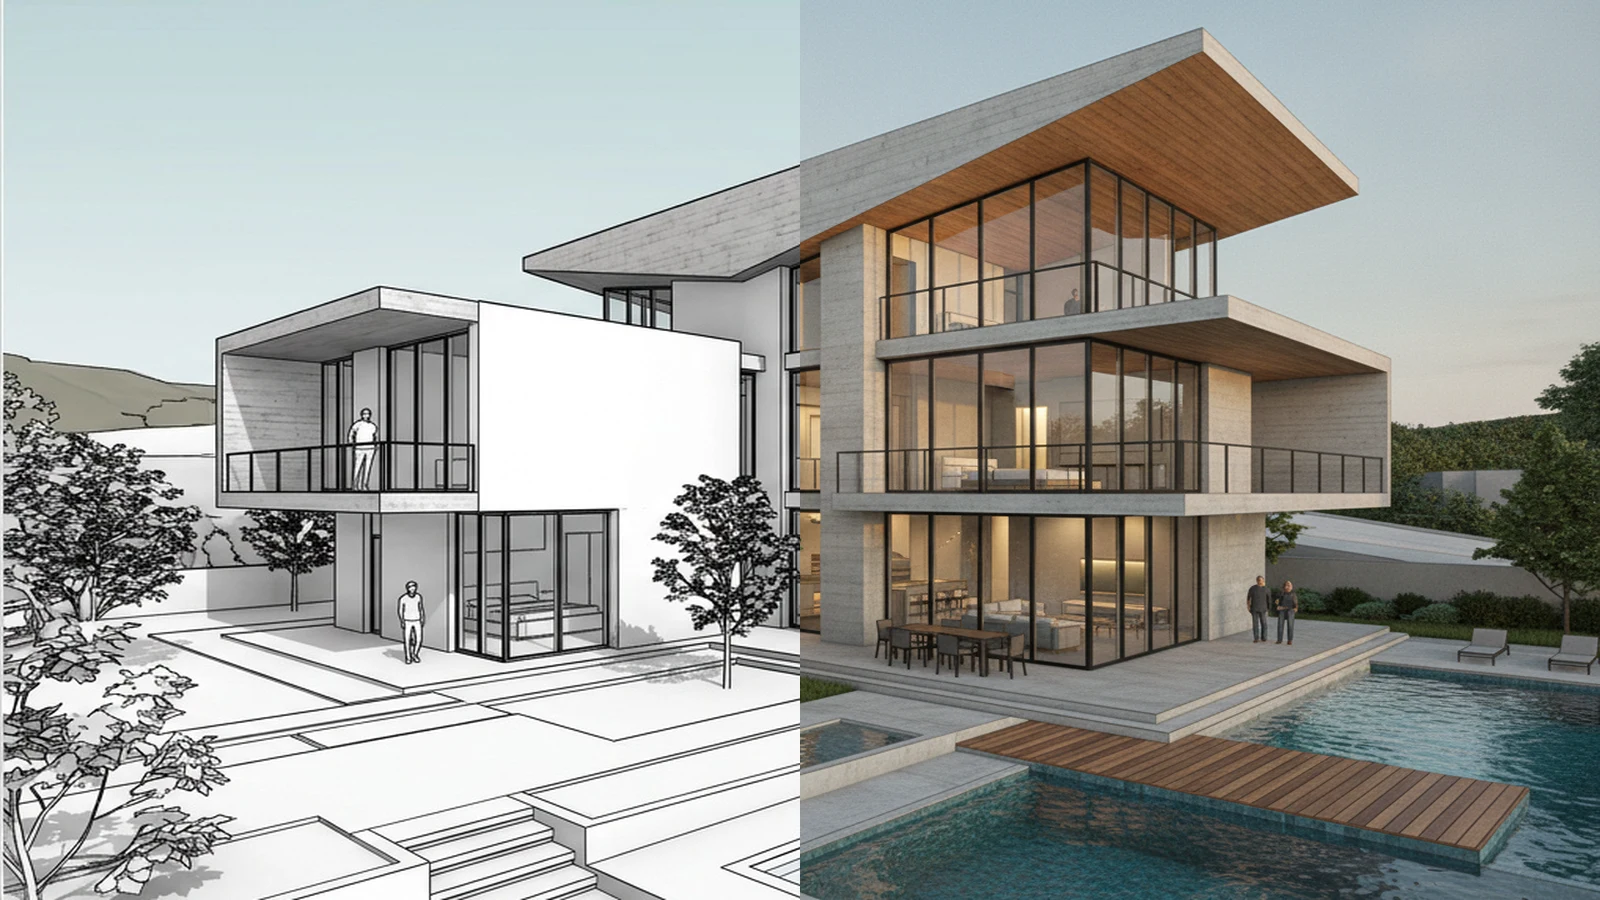
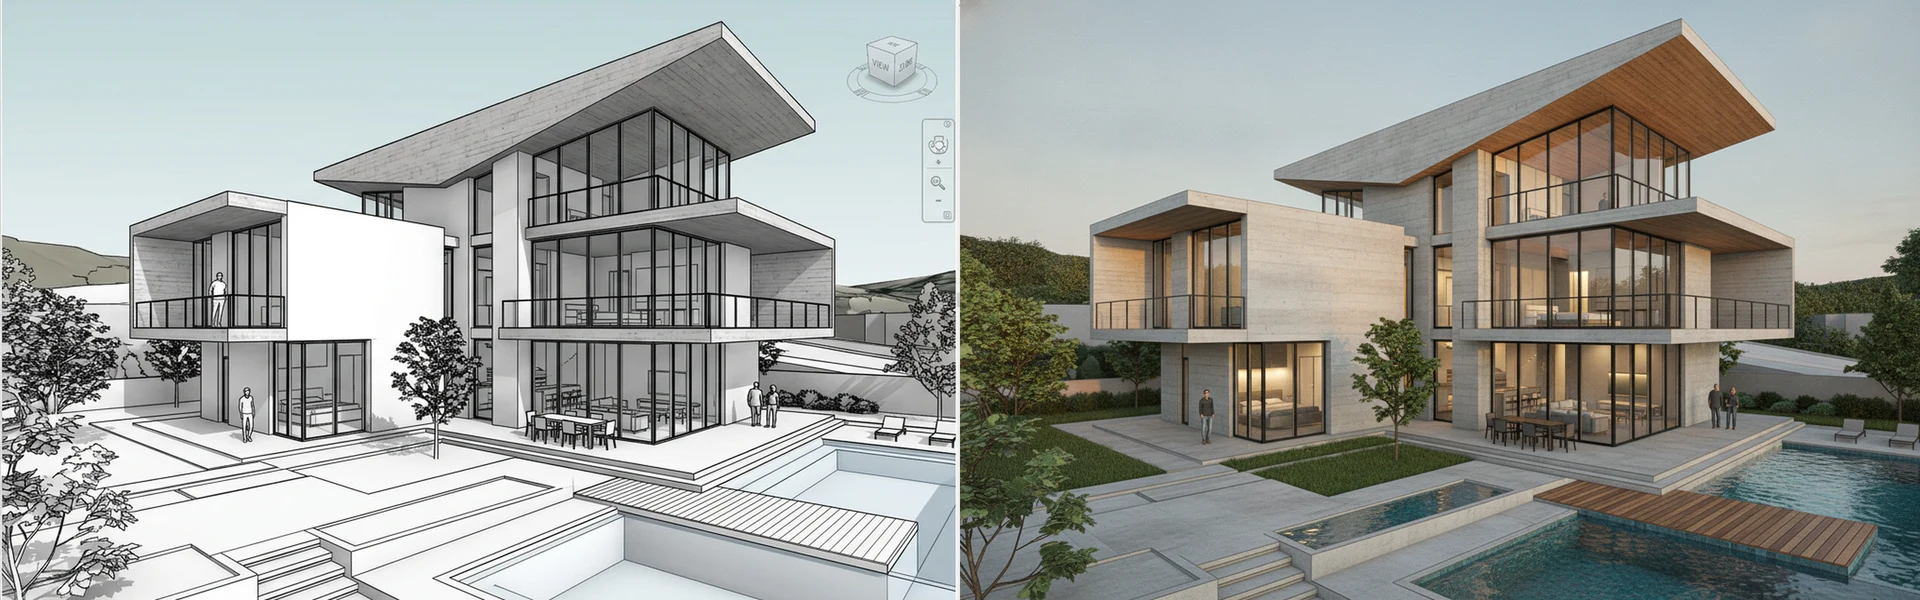
Enter AI-assisted BIM rendering. By leveraging browser-based sketch-to-image and massing rendering tools like Draw3D, architects can take a standard Revit 3D viewport export and turn it into an ultra-photorealistic architectural render in under fifteen seconds—with zero plugin installations, zero GPU setup, and zero prompt hallucination.
Why Traditional Revit Rendering Falls Short in 2026
During early schematic design and design development (DD), architects present progress updates to clients and stakeholders every single week. Traditional rendering pipelines fail this rapid iteration cycle for three clear reasons:
- The Material Mapping Trap: In Revit, assigning realistic bump maps, reflections, and glass refraction across dozens of component families requires hours of tedious clicking through nested dialog boxes.
- Cloud Credit Burn & Render Queues: Autodesk Cloud Rendering charges cloud credits and places jobs in slow shared server queues, only to deliver mediocre results that require heavy Photoshop post-processing.
- The IT Bottleneck: Large firms with centralized IT environments often take weeks to approve and deploy desktop rendering add-ins across distributed teams.
A browser-based AI pipeline decouples geometric modeling from lighting and material synthesis. You model freely in Revit, export a view, and let the AI handle realistic lighting, environmental reflections, landscaping, and material textures.
The 4-Step "Zero-Plugin" Revit to AI Workflow
Here is the exact step-by-step pipeline professional architecture studios use to transform Revit models into client-ready presentation boards in minutes.
Step 1 — Set Up Your Camera Perspective in Revit
Great rendering starts with strong composition. Inside Revit:
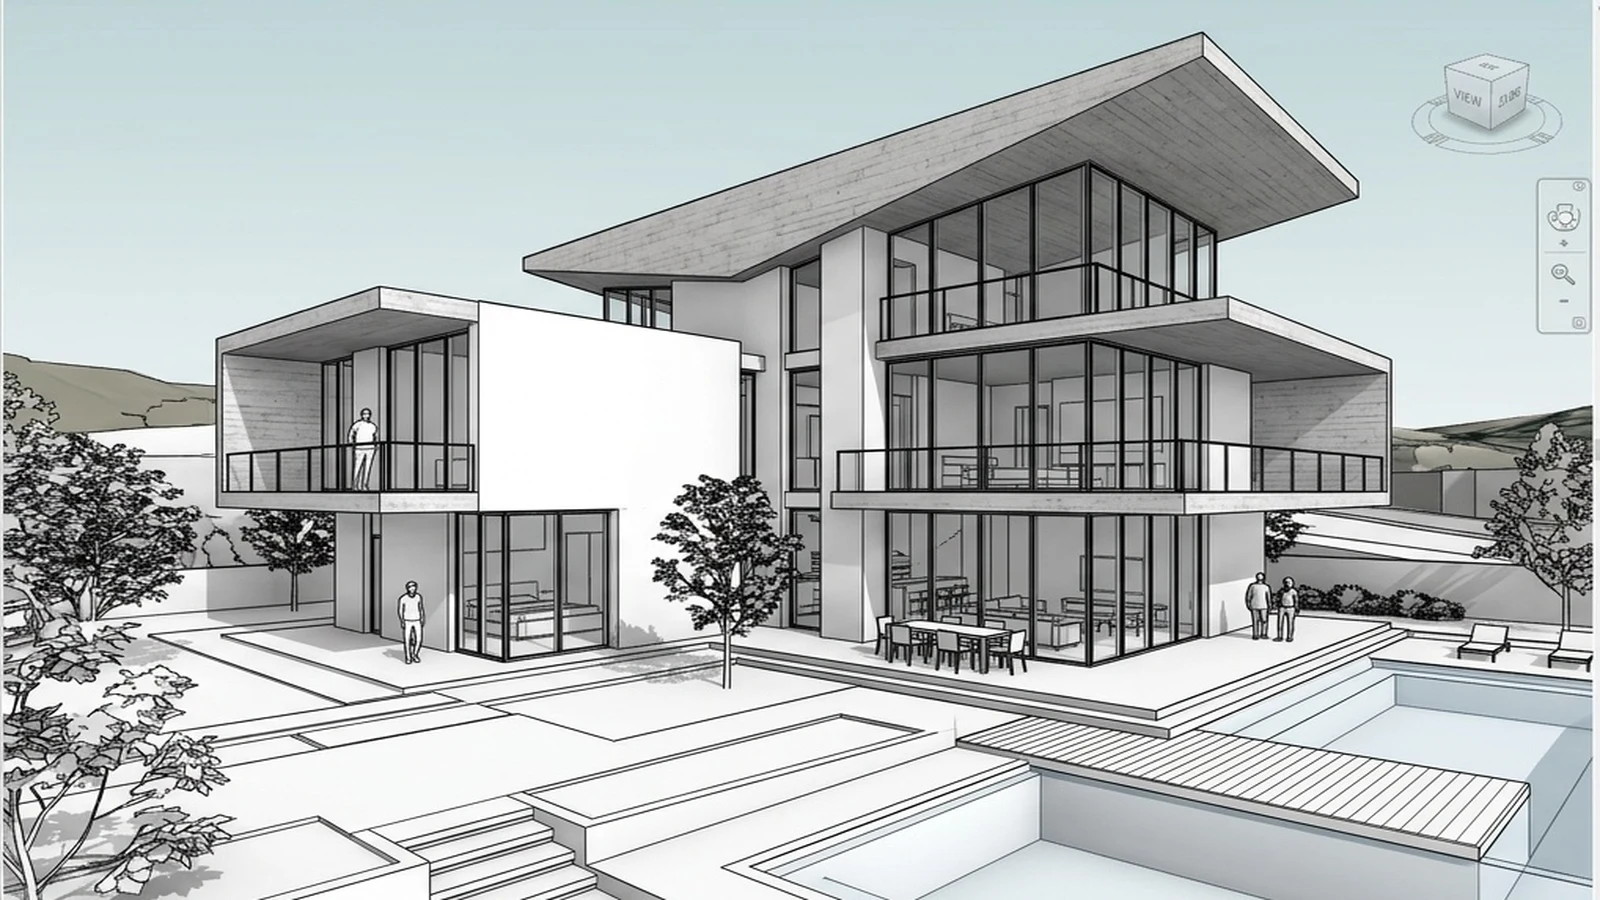
- Place a dedicated 3D Perspective Camera at human eye level (1,500 mm to 1,700 mm elevation) or set up a dramatic two-point perspective angle.
- Switch the Visual Style to Hidden Line or Shaded with Edges.
- Turn on Cast Shadows and Ambient Shadows in Graphic Display Options. This gives the AI depth cues regarding building overhangs, window insets, and wall planes.
Step 2 — Export a High-Resolution Viewport Image
Go to File > Export > Images and Animations > Image. Set the export settings to:
- Export Range: Current window.
- Image Size: 2,000 to 4,000 pixels wide (PNG format).
- Raster Quality: High (300 DPI).
This takes approximately two seconds and creates a crisp raster representation of your building geometry with clean, readable vector edges.
Step 3 — Direct Materials with Multi-Region Tagging
Standard text-to-image generators suffer from "prompt bleeding"—if you prompt "board-formed concrete walls, natural cedar louvers, and clear glass curtain wall", the AI will often plaster wood grain onto the glass or concrete onto the roof.
In Draw3D, you use multi-region annotation to dictate materials zone-by-zone:
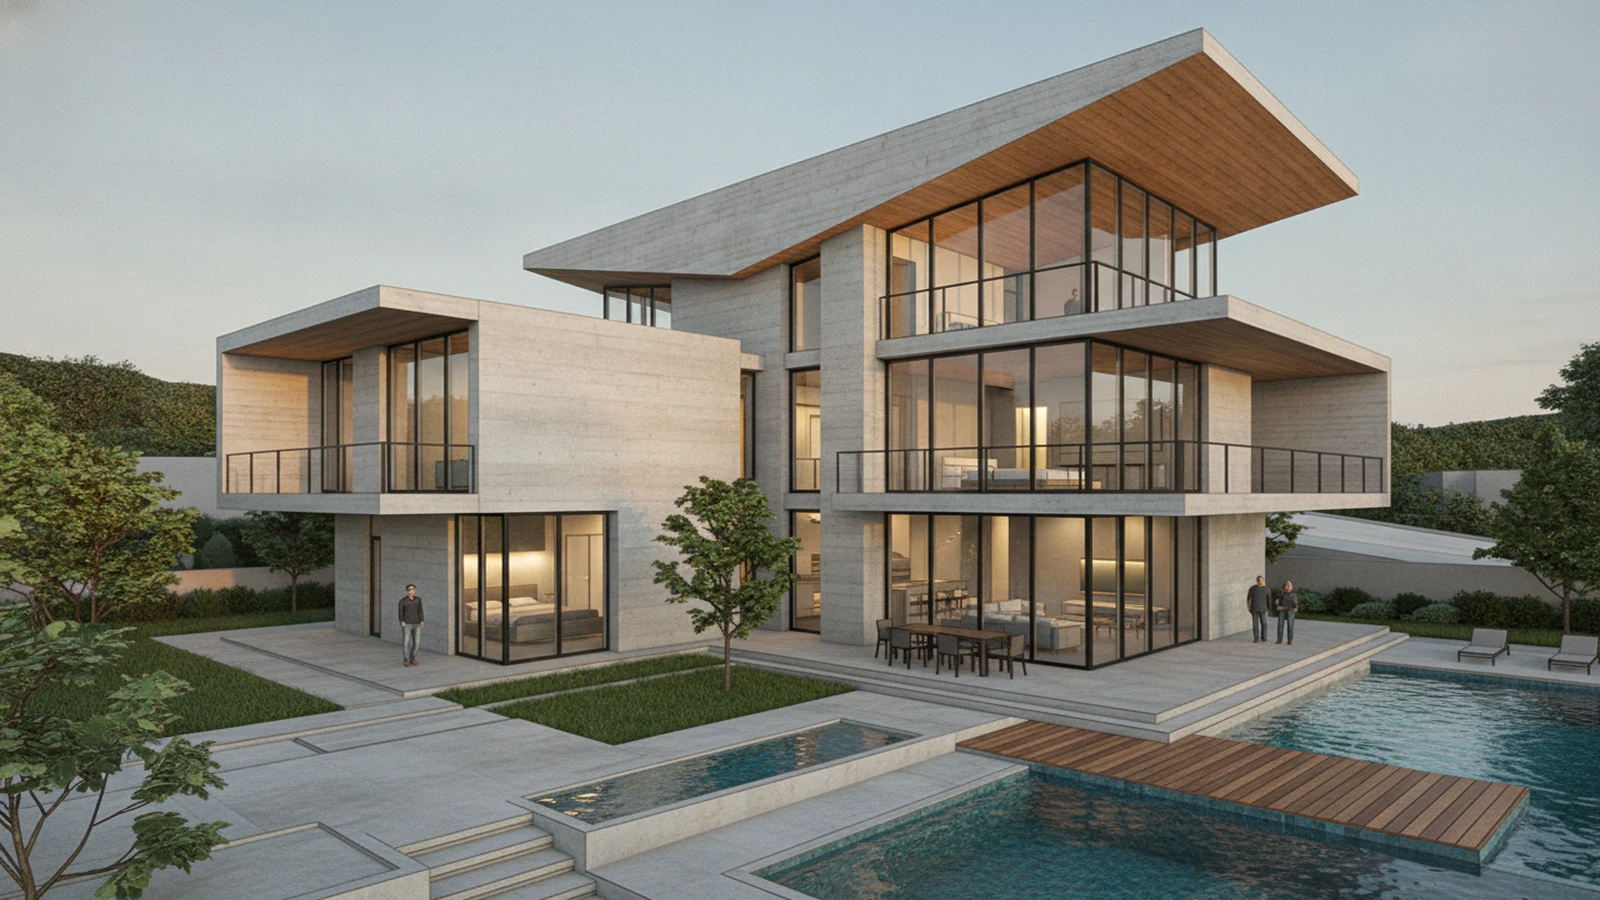
- Curtain Wall Facade: Tagged as "floor-to-ceiling clear architectural double glazing, black aluminum window mullions, warm interior lighting glowing through".
- Solid Structural Walls: Tagged as "smooth light-grey board-formed architectural concrete with subtle formwork tie-rod holes".
- Roof Soffit: Tagged as "warm tongue-and-groove cedar wood slats".
- Patio & Pool: Tagged as "honed travertine stone paving, teak wood deck, clear turquoise infinity pool with gentle water ripples".
Step 4 — Generate and Refine in Seconds
Hit Generate. In under fifteen seconds, Draw3D synthesizes accurate light transport, caustic reflections in the pool, realistic foliage, and atmospheric sky gradients while strictly adhering to the spatial geometry of your Revit model.
Need to test daytime bright sunlight versus golden hour sunset? Simply toggle your lighting preset without re-rendering the model from scratch.
Preserving Geometric Fidelity and Structural Accuracy
The most common complaint architects have about general AI generators (like Midjourney) is that they "re-invent" the building. A client who approved a specific window grid or cantilever will immediately notice if the AI bends the roof or removes a staircase.
Draw3D protects architectural accuracy through:
- Strict Edge Conditioning: Structural boundaries, balcony railings, and mullion divisions are locked in place.
- Scale & Proportion Preservation: Floor-to-floor heights and door clearances remain architecturally plausible.
- 8x High-Resolution Detailing: Need to print an A0 competition board? Upscale the render up to 8x resolution to reveal tactile concrete textures and crisp glass reflections without pixelation.
From Still Renders to Cinematic Client Walkthroughs
In 2026, competitive RFP pitches and developer presentations rarely rely solely on static images. Once your Revit view is rendered in Draw3D, you can use the integrated image-to-video studio to generate a 4-second orbiting drone shot or push-in camera reveal in one click.
This allows design teams to deliver motion storyboards and video teasers within minutes of completing a schematic Revit iteration—a workflow that previously required a dedicated 3D visualization studio and weeks of render farm time.
5 Pro Tips for Flawless Revit AI Renders
- 1. Clean Up Extraneous Elements: Turn off section boxes, elevation tags, and reference planes in Revit before exporting your viewport.
- 2. Use Ambient Shadows: Enabling ambient occlusion inside Revit's Graphic Display Options provides the AI with essential cavity depth cues.
- 3. Include Scale Figures: Place simple Revit entourage people on balconies or patios. This helps the AI calibrate realistic human scale and focal depth.
- 4. Specify Environmental Context: In your scene description, define the site context (e.g., "coastal pine trees, rocky cliffside, soft evening overcast lighting") to embed the building naturally into its landscape.
- 5. Iterate in Draft Mode First: Test multiple material combinations at standard resolution before generating your final 8x high-definition export.
The Future of BIM Visualization
Revit is built for BIM coordination, construction documentation, and structural integrity. It was never intended to be a real-time creative art studio. By pairing Autodesk Revit with Draw3D, architecture firms can keep the rigorous engineering precision of their BIM models while freeing their creative teams to produce breathtaking, client-winning visuals in seconds.
Ready to transform your Revit models into photoreal visuals? Try Draw3D today and experience the zero-plugin architectural rendering pipeline.
Further Reading

SketchUp to AI Render: How Architects Turn Clay Massings into Photoreal Renders in Seconds
A complete guide to the modern architectural pipeline: skipping hours of UV mapping, bump adjustments, and lighting bakes by taking raw SketchUp wireframes and clay models directly into spatial AI rendering.
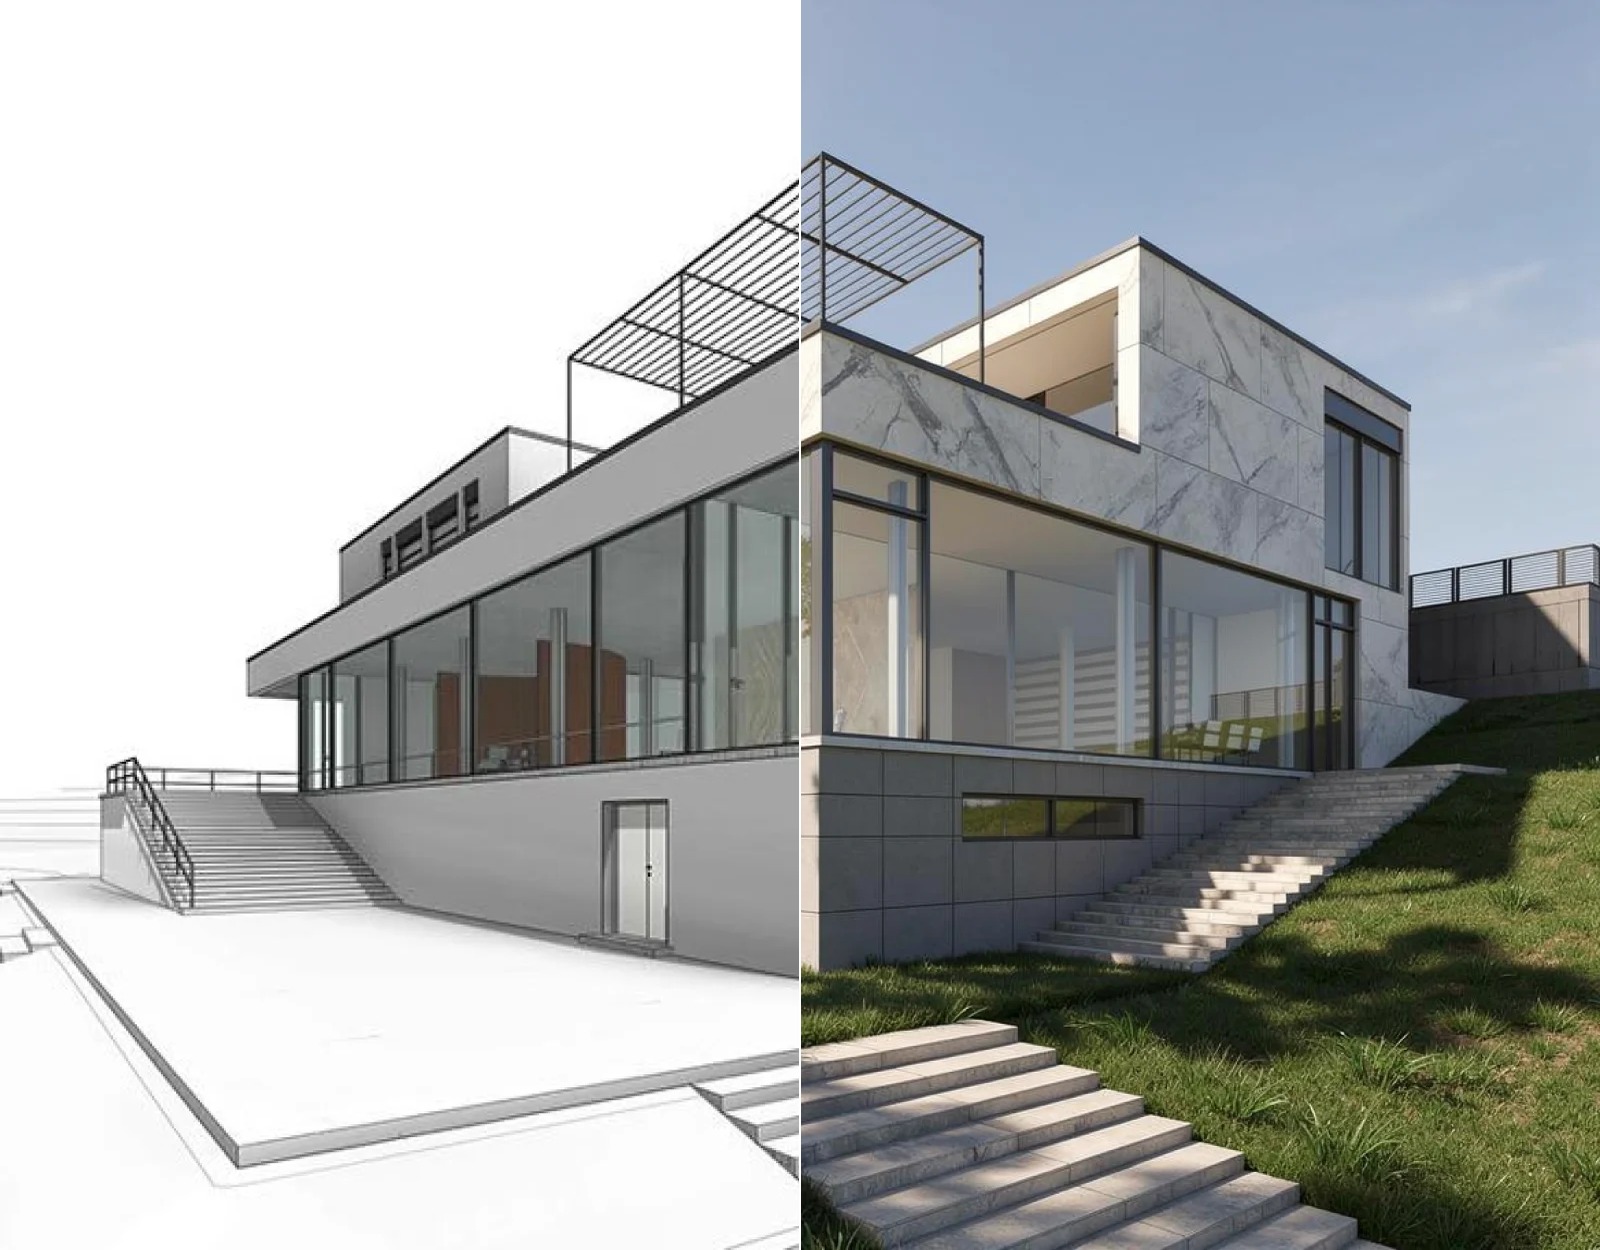
AI Architectural Rendering: How to Turn Sketches, CAD Models & Blockouts into Photorealistic Visuals in Seconds
A comprehensive guide to AI architectural rendering. Learn how modern studios convert raw sketches, 3D CAD massings, and wireframes into photorealistic renders and cinematic videos in seconds without losing geometry.