
How to Turn 2D Sketches and Floor Plans into Photorealistic 3D Renders: An Architect's Practical Guide
A practical guide for architects and interior designers on converting 2D floor plans, elevation sketches, and trace paper concepts into photorealistic interior renders without losing weeks to 3D modeling pipelines.
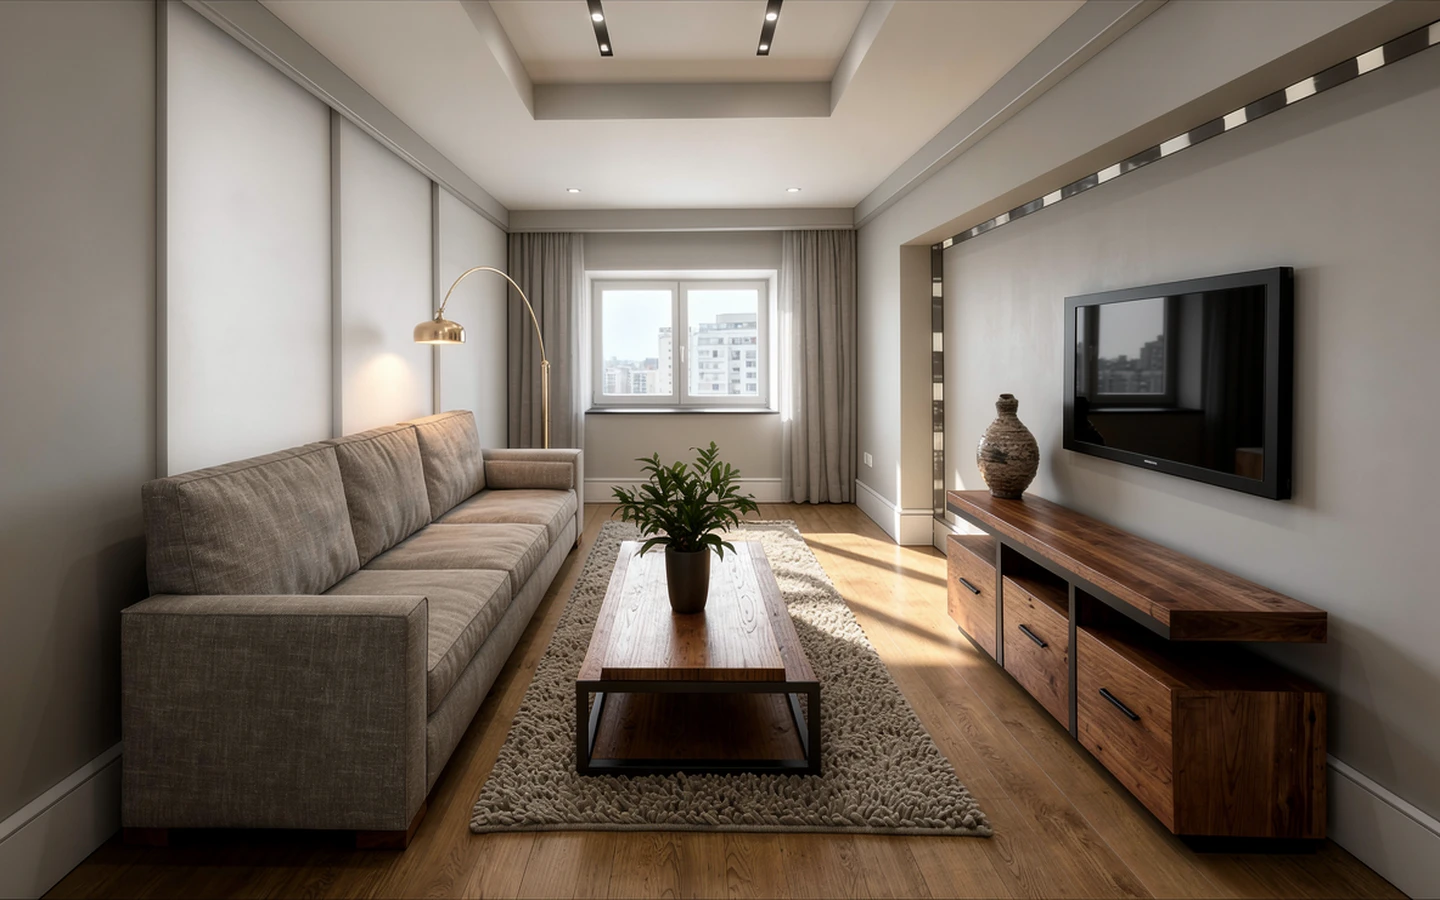
Every practicing architect and interior designer knows the friction of the early design phase: clients struggle to visualize 2D orthographic floor plans, yet spending 40 hours building full 3D models in 3ds Max or V-Ray for an exploratory schematic meeting is an unbillable time sink.
When you look at an architectural floor plan with a dashed door swing, a 150mm wall hatch, and window reveals, your spatial memory immediately calculates ceiling height, sightlines, and volumetric proportion. But to a residential client, commercial tenant, or property developer, that floor plan is an abstract puzzle. They nod politely in meetings, but freeze with hesitation because they cannot picture how the space will feel.
Bridging this communication gap has historically required choosing between two compromises:
- The Slow Route: Drafting CAD → modeling in SketchUp/Revit → assigning complex PBR material maps → positioning omni lights in V-Ray/Corona → waiting through 8-hour rendering passes. If the client wants to change the walnut millwork to limewashed plaster, the entire loop starts over.
- The Uncontrolled AI Route: Typing a text prompt into generic image generators like Midjourney, only to receive an image that hallucinates the layout, moves load-bearing walls, invents impossible structural spans, and cannot be built in reality.
Today, a cleaner hybrid workflow is taking hold in forward-thinking studios: Spatial Conditioning. By pairing hand-drawn line weight hierarchy with spatial generative rendering, you can convert rough pencil trace sketches, iPad drawings, or 2D CAD exports into photorealistic interior renders in minutes—while preserving 100% of the room's true geometry.
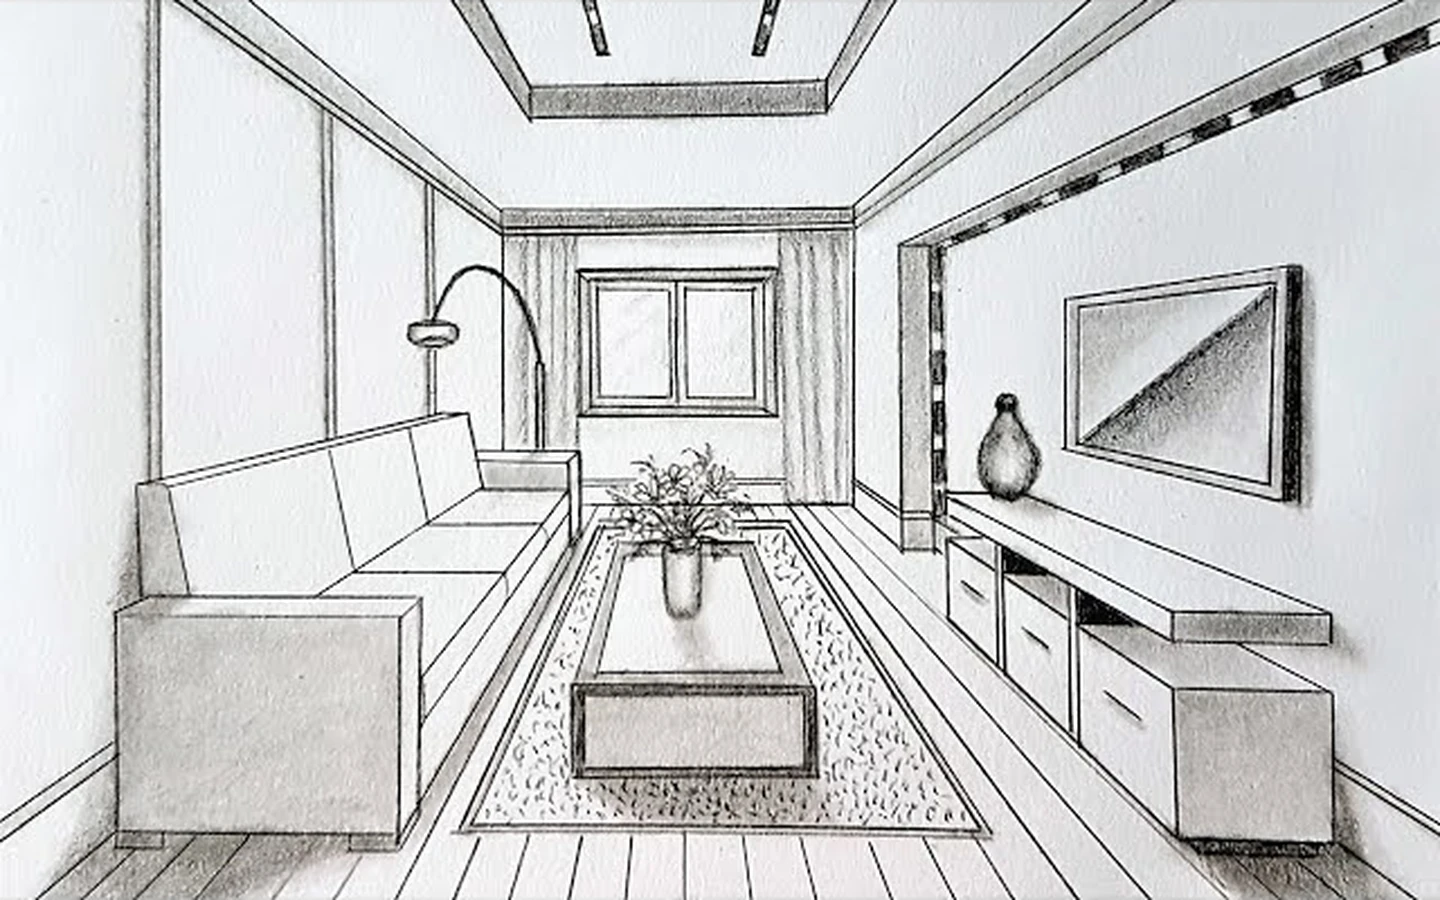
The 4 Rules of "Render-Ready" Architectural Sketches
Generative spatial renderers do not read minds; they read edge vectors, depth gradients, and contrast boundaries. If your input drawing is a chaotic scribble with ambiguous lines, the resulting render will inherit that ambiguity.
Whether you draw on physical trace paper with a 0.5mm pen or on an iPad with an Apple Pencil, these four drafting rules make your sketches ready for clean rendering:
- Line Weight Hierarchy: Establish strict linework contrast. Use heavy lines for structural walls and floor boundaries, medium lines for furniture silhouettes (sofas, credenzas, kitchen islands), and light, fine lines for floor textures, rug perimeters, and tile joints. This signals foreground and background depth clearly to the spatial engine.
- The 1.50m Eye-Level Anchor: In interior perspective sketching, anchor your horizon line at 1.50 meters (5 feet) above the finished floor level. Setting the camera horizon too high creates an unnatural high-angle view; setting it too low warps ceiling planes. Human eye-level anchors give the client an immediate feeling of standing inside the space.
- Semantic Material Tagging: Don't leave material intent to guesswork. Annotate directly on the sketch or on an overlay layer with simple callout tags: "Honed Travertine", "Fluted White Oak", "Bouclé Fabric", "Brushed Brass". Modern tools recognize these text annotations as direct semantic constraints, applying the exact specified material to the exact surface.
- Aperture & Daylight Vectors: Indicate openings clearly. Draw simple dashed lines or directional arrows outside window frames to show where natural sunlight enters. When the engine detects window jambs and incoming angles, it calculates natural light falloff, secondary bounces, and soft window reveals accurately.
"The goal of schematic rendering is not to replace full CAD documentation—it is to eliminate hesitation in client meetings so design decisions happen in days instead of weeks."
Lighting Physics: Why Most AI Interior Renders Look Fake
The telltale sign of an amateur rendering is lighting that defies physics: furniture casting shadows in three contradictory directions, sunlight beaming through solid drywall, or interior walls that have zero ambient occlusion (contact shadows).
In architectural visualization, photorealism is governed by a consistent three-tier lighting hierarchy:
- Tier 1: Key Daylight (5500K – 6500K): The dominant natural light entering through sliding glass walls or windows. In your render prompt, specify orientation: "Soft north-facing daylight" produces gentle, even shadows; "Warm late-afternoon southern sunlight" produces long, dramatic rake shadows across the floorboards.
- Tier 2: Ambient Architectural Glow (2700K – 3000K): Recessed ceiling cove lighting, indirect LED linear strips behind millwork, and understated wall sconces. Notice the deliberate contrast: daylight is cool (~5500K), while interior accent lights are warm (~2700K). This dual-tone split creates depth and warmth that mirrors high-end architectural photography.
- Tier 3: Contact Ambient Occlusion (AO): The subtle, dark shadow crevice where a sofa leg meets a hardwood floor or where a marble plinth meets the rug. In spatial generative engines, ensuring your sketch connects furniture legs directly to the floor line anchors the pieces firmly, preventing floating artifacts.
The CMF (Color, Material, Finish) Cheat Sheet
Generic prompts like "wood floor" or "marble wall" yield flat, plastic-looking surfaces. Generative models respond with far higher fidelity when fed precise industry CMF terminology.
| Surface Category | Avoid (Vague) | Professional CMF Descriptors |
|---|---|---|
| Hardwood Flooring | "wooden floor" | wide-plank European white oak, matte polyurethane finish, micro-beveled edges, subtle wire-brushed grain, 5% low sheen |
| Feature Walls | "plaster wall" | mineral limewash plaster, subtle hand-troweled texture, soft chalky matte finish, warm alabaster undertone, soft grazing light |
| Stone & Countertops | "marble kitchen" | honed Roman Travertine with natural unfilled fissures, satin matte surface, warm biscuit tone, mitred apron waterfall edge |
| Architectural Metal | "gold handles" | brushed unlacquered brass, organic living patina, directional satin grain, soft champagne reflection without mirror glare |
| Upholstery & Textiles | "fabric sofa" | heavyweight Belgian bouclé weave, tactile nubby texture, natural ecru tone, relaxed seams, deep comfortable foam density |
4 Style Recipes for Interior Visualization
When you pair your sketch with an exact style prompt, the spatial engine anchors to your drawn walls while dressing the scene in realistic lighting and textures. Here are four prompt formulas you can adapt:
1. Japandi Minimalist Living Space
Editorial interior photograph of an open-plan Japandi living room, seamless warm micro-cement flooring, custom fluted white oak vertical slat wall, low-profile linen sofa in oatmeal color, paper cord lounge chair, natural diffused morning light through floor-to-ceiling glass sliding doors, sheer Belgian linen drapes, architectural digest photography, shot on Hasselblad H6D-100c, 35mm lens, f/8 aperture, clean tranquil atmosphere.
2. Biophilic Sunlit Kitchen Pavilion
Architectural photography of a contemporary sunlit kitchen and dining pavilion, monolithic island clad in honed soapstone with waterfall edges, matte walnut flat-panel cabinetry, raw board-formed concrete perimeter walls, polished terrazzo floor with subtle aggregate flecks, slim black steel pivot doors opening to an internal courtyard garden, warm morning sunbeams, organic architecture.
3. Industrial Urban Loft
High-ceiling industrial loft conversion, restored weathered red brick feature wall, matte black steel factory mullion windows, burnished concrete floor with soft industrial reflections, cognac aniline leather Chesterfield sofa, exposed timber ceiling joists, 2700K warm Edison filament pendant lights, dusk atmospheric lighting, Dwell magazine feature quality.
4. Contemporary Master Suite
Luxury hotel master suite bedroom, custom fluted acoustic timber headboard panel with concealed warm LED cove lighting, low-slung platform bed dressed in crumpled washed linen sheets, honed Grigio Carnico dark marble nightstands, brushed unlacquered brass reading spotlights, floor-to-ceiling panoramic glass framing a city skyline at twilight, soft moody ambient lighting.
Pipeline Comparison: Where Spatial Rendering Fits
Spatial rendering does not replace engineering BIM tools like Revit or parametric modeling in Rhino. Instead, it solves the schematic bottleneck—allowing you to explore twenty visual directions with clients early on before investing billable hours into detailed 3D modeling.
| Criterion | CAD + V-Ray Pipeline | Real-Time GPU (Enscape/Lumion) | Spatial Generative Rendering |
|---|---|---|---|
| Starting Input | Full 3D model, UV unwrapping, light rigs | Clean 3D SketchUp/Revit geometry | Rough hand sketch, iPad drawing, or 2D floor plan |
| Time to First Render | 4 – 16 hours | 1 – 3 hours (after 3D model is built) | 1 – 3 minutes |
| Hardware Need | High-end desktop workstation | Dedicated GPU laptop or desktop | Runs in browser (Cloud inference) |
| Client Revision Agility | Slow (Hours to re-model and re-bake) | Moderate (Requires 3D geometry changes) | Instant (Inpaint or sketch over the region) |
| Ideal Project Phase | Final marketing, permit submission | Design development & client review | Schematic ideation & initial client pitches |
5 Common Mistakes to Avoid
- Over-Prompting with Conflicting Styles: Writing "minimalist Japandi industrial art deco loft" confuses the model. Stick to one cohesive stylistic narrative, one primary wood tone, and one stone type per room.
- Blown-Out Windows: If window panes turn into blinding pure white rectangles, add "subtle outdoor courtyard view through tinted glazing" or "sheer linen privacy drapes" to prevent aperture blowout.
- Ignoring Human Scale: Without familiar objects, AI might render a coffee table that looks two meters tall. Include architectural scale references in your sketch: a standard dining chair (450mm seat height), a pendant lamp, or an open doorway.
- Starting Over Instead of Inpainting: If the room geometry, lighting, and walls look right but the client dislikes the rug, never re-render the whole image. Brush an inpaint mask over the rug, prompt "neutral beige wool Berber rug with subtle geometric weave", and regenerate only that area.
- Low-Resolution Exports: Initial outputs are typically 1024x1024 pixels. For high-resolution client presentation boards or printed portfolios, run the image through an AI Pro Upscaler to bring out clean wood grain and fabric weave.
The 8-Point Client-Ready Render Checklist
Before sharing a render with a client, run through this quick quality check:
- ✓ 1.50m eye-level horizon line maintained (no warped ceiling perspective)
- ✓ Single cohesive wood species across all visible millwork
- ✓ Dual color temperature balance (5500K daylight vs. 2700K ambient interior lights)
- ✓ Contact shadows clearly visible beneath furniture legs (no floating objects)
- ✓ Window daylight direction aligns with shadows across the floor
- ✓ Glass surfaces show realistic reflections rather than blown-out white holes
- ✓ Materials look tactile (visible weave on textiles, subtle grain on wood and stone)
- ✓ Image upscaled to high resolution for clean presentation display
The future of architectural visualization is not about replacing the human designer's creative hand—it is about removing the friction between your sketchpad and the client's imagination. By mastering spatial linework, lighting physics, and precise material vocabulary, you can present fully visualized design concepts while saving dozens of hours on every project.